
In NetSuite there are two web service options for integration with external systems: Restlet (REST) and SuiteTalk (SOAP). Restlets are a RESTful service which extend the SuiteScript API and are generally fast, flexible and NetSuite developer friendly. However, to integrate two systems together using a Restlet, requires knowledge of SuiteScript since most of the heavy lifting is on the NetSuite side.
SuiteTalk, on the other hand, doesn’t require any SuiteScript knowledge. The systems integrator only needs to create the request following NetSuite's documented schema from the third-party application or middleware and to create/update/delete records inside NetSuite. In this article, we'll provide a quick and simple guide for the NetSuite SuiteTalk interface to help you get started with SuiteTalk right away.
In this guide, we will be using SoapUI, a very useful and free Web Service testing tool, to create a Task record in your NetSuite environment. We chose the Task record for simplicity and because it is readily available in most accounts.
What is SoapUI?
“SoapUI is a tool for testing Web Services; these can be the SOAP Web Services as well RESTful Web Services or HTTP based services. SoapUI is an Open Source and completely free tool with a commercial companion -SoapUI NG Pro- that has extra functionality for companies with mission critical Web Services.” - https://www.soapui.org/
How to Install and Configure SoapUI for NetSuite
- Download and install SoapUI from https://www.soapui.org/
- Once installed, create a new SOAP project by going to File -> New SOAP Project
- Enter a project name and WSDL address (https://webservices.netsuite.com/wsdl/v2016_1_0/netsuite.wsdl)
- Click OK and save the .xml file to appropriate directory
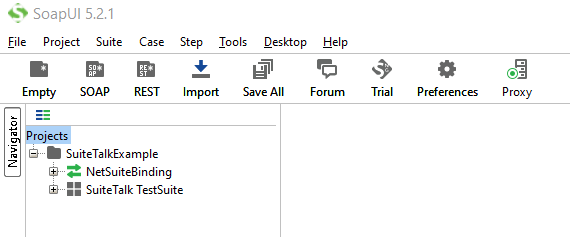
- SoapUI will then load all definitions from WSDL address and create a new project
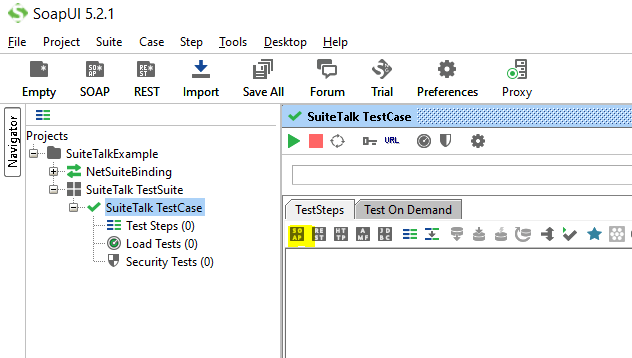
Create New TestSuite, TestCase and Test Step in SoapUI
- Right click on the project created and select New TestSuite, entered the name (SuiteTalk TestSuite) and click OK

- Right click on SuiteTalk TestSuite and select New TestCase, enter the name (SuiteTalk TestCase) and click OK

- Click on the SOAP in the SuiteTalk TestCase window, and entered the name for the new step (NetSuiteCreateTask Request). Since we are only going to create one Task record in your NetSuite account, select NetSuiteBinding -> add in the new window.
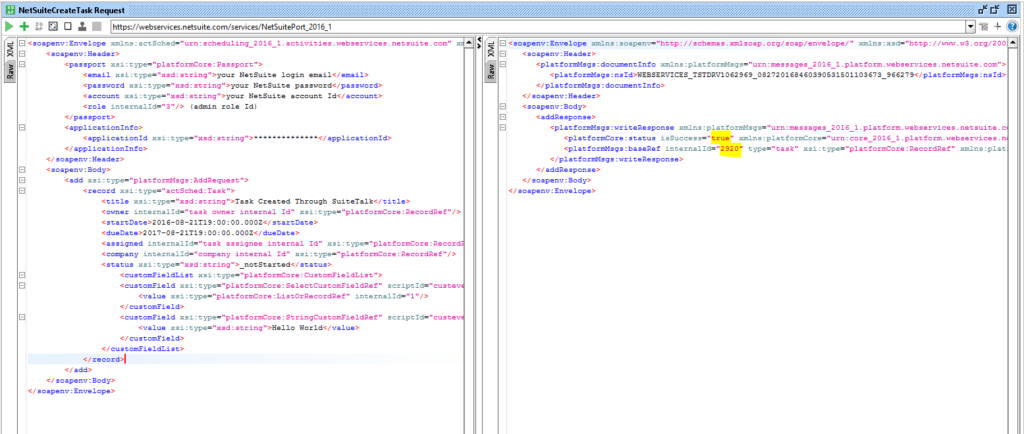
- SoapUI will create an sample SOAP request based on the add definition, clear the window and copy the following SOAP request into the window and save. This request will create one Task record in your NetSuite account based on the data provided. We will explain the request in detail later.
<soapenv:Envelope xmlns:actSched="urn:scheduling_2016_1.activities.webservices.netsuite.com" xmlns:xsd="http://www.w3.org/2001/XMLSchema" xmlns:platformCore="urn:core_2016_1.platform.webservices.netsuite.com" xmlns:soapenv="http://schemas.xmlsoap.org/soap/envelope/" xmlns:platformMsgs="urn:messages_2016_1.platform.webservices.netsuite.com" xmlns:xsi="http://www.w3.org/2001/XMLSchema-instance">
<soapenv:Header>
<passport xsi:type="platformCore:Passport">
<email xsi:type="xsd:string">your NetSuite login email</email>
<password xsi:type="xsd:string">your NetSuite password</password>
<account xsi:type="xsd:string">your NetSuite account Id</account>
<role internalId="3"/> (admin role Id)
</passport>
<applicationInfo>
<applicationId xsi:type="xsd:string">**************</applicationId>
</applicationInfo>
</soapenv:Header>
<soapenv:Body>
<add xsi:type="platformMsgs:AddRequest">
<record xsi:type="actSched:Task">
<title xsi:type="xsd:string">Task Created Through SuiteTalk</title>
<owner internalId="task owner internal Id" xsi:type="platformCore:RecordRef"/>
<startDate>2016-08-21T19:00:00.000Z</startDate>
<dueDate>2017-08-21T19:00:00.000Z</dueDate>
<assigned internalId="task assignee internal Id" xsi:type="platformCore:RecordRef"/>
<company internalId="company internal Id" xsi:type="platformCore:RecordRef"/>
<status xsi:type="xsd:string">_notStarted</status>
<customFieldList xsi:type="platformCore:CustomFieldList">
<customField xsi:type="platformCore:SelectCustomFieldRef" scriptId="custevent_mycustfield1">
<value xsi:type="platformCore:ListOrRecordRef" internalId="1"/>
</customField>
<customField xsi:type="platformCore:StringCustomFieldRef" scriptId="custevent_mycustfield2">
<value xsi:type="xsd:string">Hello World</value>
</customField>
</customFieldList>
</record>
</add>
</soapenv:Body>
</soapenv:Envelope>
Understanding the Request
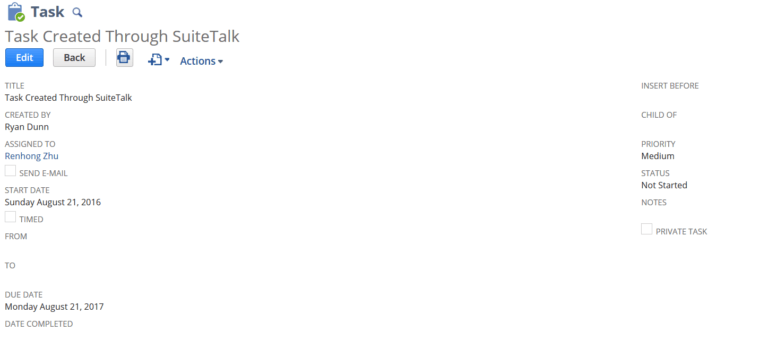
- Task record in UI
To Create a Task record through UI, log in to your NetSuite account, go to Activities -> Scheduling -> Tasks -> New.

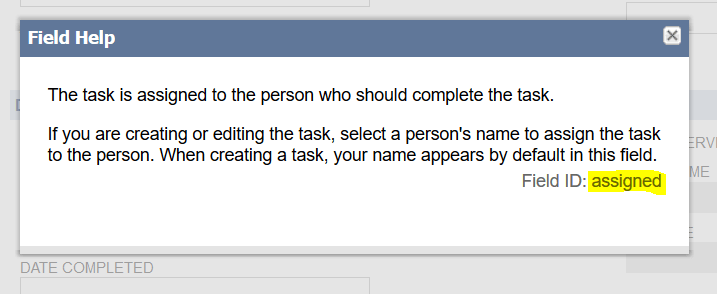
This gives you a brief idea of the Task record. If you need the id of a field, simply click on the field label. (You need to have Show Internal Ids check box checked on your Set Preferences page.) You will need the field ids to update corresponding field values.
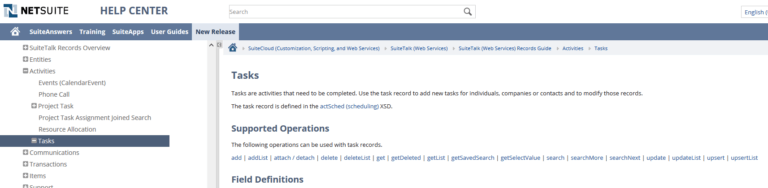
- Task record in Schema Browser
The Schema Browser is the key to SuiteTalk, it gives all the information to construct your request. To check the Task record schema, enter https://system.na1.netsuite.com/help/helpcenter/en_US/srbrowser/Browser2016_1/schema/record/task.html in your browser. Note the '2016_1' in the URL. NetSuite updates the schema during every major release, so you want to use the most recent version when you start your development.
Note: NetSuite deprecates their SuiteTalk endpoints every three years, so you don't have to update the version each release, just every 3 years.
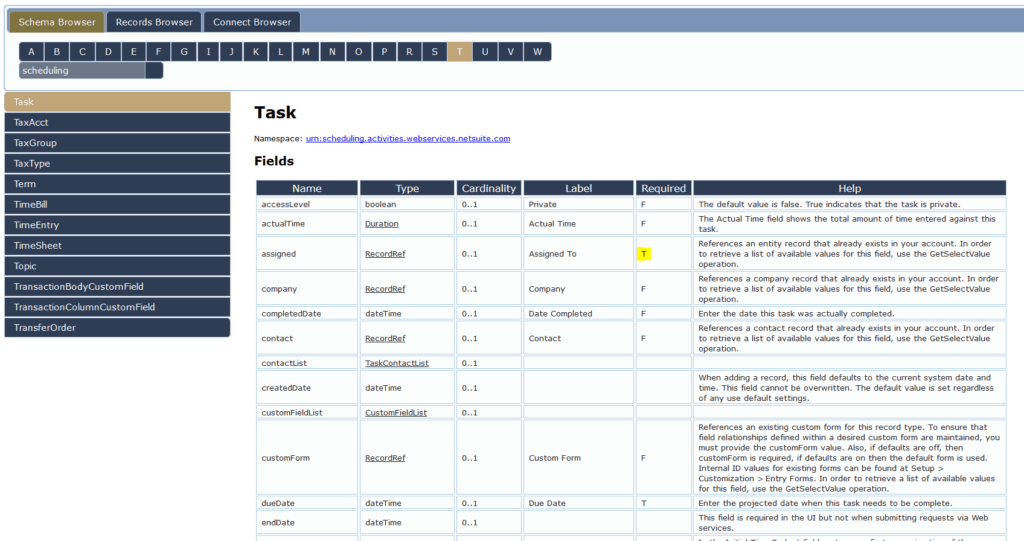
The schema gives you the internal id and the type of standard Task fields. You should also pay attention to required fields as a missing value could result in a bad request. Be careful, the schema doesn’t include custom fields. For information regarding Task record custom fields, go to Customization -> Lists, Records, & Fields -> CRM Fields. You will able to see the id and field type in the list.

- Now, let’s try to understand the structure of the Header part
- passport - This tag is used for request level authentication. The information should include email, password, account and role. NetSuite recommends request level authentication based on the performance.
- applicationInfo - Application Id is required for requests using end point 2015.2 or later. Application Id can be found by going to SetUp -> Integration -> Manage Integrations for NetSuite UI using Admin role. (Refer to NetSuite Help for Managing Integrations topic in case you don’t have Integration record setup in your account.)
- Let’s take a look at the Body. In the Body part, there is nothing but definition of a list of actions and data for the actions
- add - This is an action supported for Task record in NetSuite. It will create one record in NetSuite for each record type inside of the tag with the given data. Make sure all required fields are included. Refer to Web Services Supported Records for a list of supported operations for Task record.
-
- Custom Fields - To use custom fields, we need to include custom fields in customFieldList tag. We can see we need to provide custom field Id, type and value for each custom field
- More information regarding authentication, supported records, supported actions, supported fields and examples can be found on NetSuite Help Center and Schema Browser
Sending the Request and Confirming Reception
Once you have entered data for credential information and required fields, we are ready to send the request to NetSuite. Double click NetSuiteCreateTask Request, then click on the play button and SoapUI will send the request to your NetSuite account.

The response will be displayed in the right window whether it is successful or not.
- In case of success, look for the Body section for more information. Below is what I have in the Body. It tells us that the request was processed successfully and the internal id of the task record created is 2920.
- At this point, you should also be able to see the record in your NetSuite account
- In case of failure, look for the error message to identify the problem.
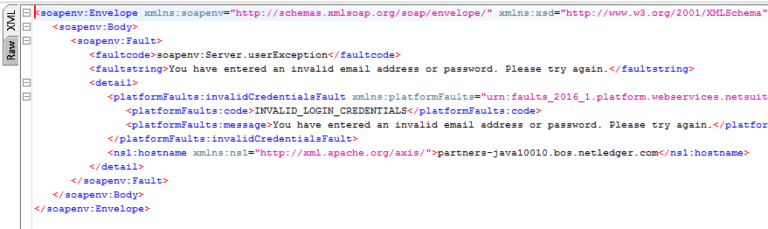
- Common issues:
- Wrong credentials
- No or wrong application Id
- Insufficient Permission (Request role doesn’t have access to certain record types)
- Missing required fields
- Field data format not supported by NetSuite
Hopefully, you’ve learned how to connect to NetSuite using SuiteTalk and SoapUI in a matter of minutes. There is still a long way to go. We recommend that you check out NetSuite Help Center for SuiteTalk capabilities and documentation. We would like to thank SoapUI https://www.soapui.org/ for making such a great tool available to the public for free. Stay tuned for more tips and techniques and happy coding!


