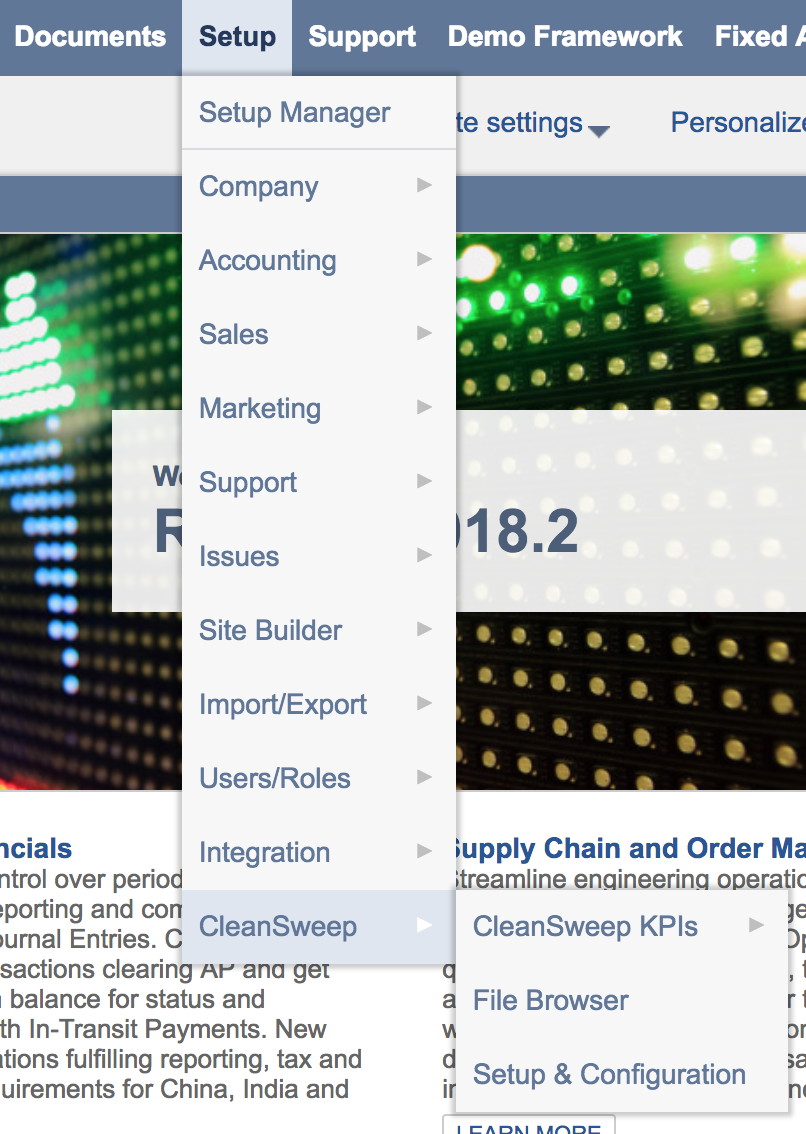
Upon installation of the software, you will see the CleanSweep selection under the Setup menu. Choose “Setup & Configuration” in the
Fig. 1 – CleanSweep selection under the Setup menu in NetSuite reveals Setup & Configuration and File Browser choices

Fig. 2 – CleanSweep selection under the Setup menu in NetSuite reveals Setup & Configuration and File Browser choices
The first time you use the software, you will be prompted to
Upon login, you will see the File Purge Settings screen, where you can make your archive/purge selections.

Fig. 4 – File Purge Settings tab of Setup & Configuration screen
Choosing the Account Info tab will allow you to see your licensing information, and reset your password if needed.

Fig. 5 – Account Info tab of Setup & Configuration screen
The File Purge Settings screen is where you will
Fig. 7a – Retention Policy choices
On the File Purge Settings tab, you will see a variety of Retention Policy choices. Please make your selections carefully, as once files are purged, they cannot be retrieved.
The File Types to Purge
Fig. 7c – File size parameters
Once your file types have been selected you’ll specify the size of files to purge.

Fig. 7d – Folders & Files to Preserve
Preserving specific objects that fit your purge configuration can be done in two ways, by folders and/or files. To preserve folders you can type the internal ID or name in the multi-select input box. To preserve a file click the Add/Remove Files link and create a new CleanSweep | Files To Preserve custom record.
Fig. 7e – File/Record Links to Preserve
When the bundle is first installed the default value for File/Record Links to Preserve is All Record Types. If you’d like to maintain file/record relationships attached to a specific record type you can select the types to preserve. Selecting specific record types to preserve the file relationship will also assist with optimizing CleanSweep in your account.
Once finished configuring your purge criteria click the save button at the bottom of the page.
Fig. 8 – File Browser Screen
Choosing the File Browser selection in the CleanSweep menu will launch the File Browser window shown above in Figure 8. Until an archive has run, there will be no files to display. Once an archive has been run, the File Browser screen will show the folders and files structure of your archive. This file/folder structure will mimic the layout that was in NetSuite, providing a seamless transition to your files stored in CleanSweep File Manager.
Selecting a file in the File Browser will launch a popup window with file metadata, and a button to download the file. Depending on your browser settings, the Download File button will either open the file in a new
Fig. 9 – Files attached to records a sales order listed on CleanSweep Tab
Record types that were selected in the File/Record Links to Preserve section (see Section 7d and 7e) will have a CleanSweep tab that lists all files attached.
If you have custom record attachments or custom document fields that also need to be preserved please contact us
Fig. 10 – Download file page
Clicking on the download link in Figure 10 will load the link from the secure CleanSweep archive.
CleanSweep File Manager – v1.3.1
August 3, 2018
New Features:
Bug Fixes:
CleanSweep File Manager – v1.3
June 15, 2018
New Features:
Bug Fixes:
CleanSweep File Manager – v1.2
February 23, 2018
New Features:
Bug Fixes:
CleanSweep File Manager – v1.1
June 9, 2017
At SuiteWorld,
This feature does not support links to files and custom file fields, custom records that reference files, or custom transaction types.
New Features:
Bug Fixes:
CleanSweep File Manager SuiteApp – v1.0
December 8, 2016
The CleanSweep File Manager SuiteApp helps NetSuite customers archive the contents of the file cabinet to the cloud for
New Features:
1900 Market Street, 8th Floor
Philadelphia, PA 19103
© 2025 Techfino LLC,
All Rights Reserved

